Sparkly Christmassy manicure.
I did a sparkly manicure for Christmas after all!
Well, something happened earlier and my manicure was all RUINED. It was supposed to be a happy event.. I was unboxing another box of nail polishes that just arrived today but one of the bottles broke and it was a mess.
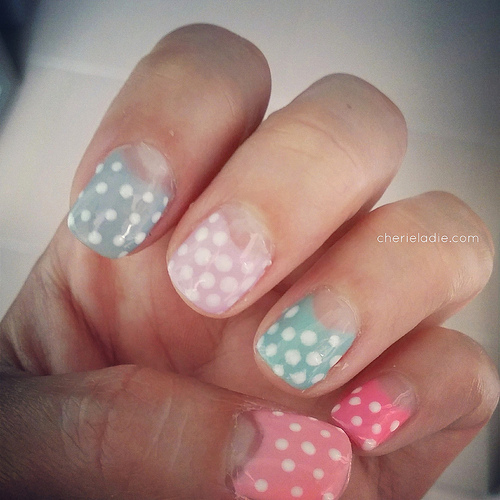
This was my hands after I attempted cleaning up. Before that, I didn’t even dare to touch my phone to snap any pictures. So yeah, my polka dotted French manicure is gone.
I just spent the last hour doing another quick manicure (and matching pedicure). I did attempt to draw snowflakes but gosh, I don’t really have a steady hand to hold the fine brushes and it turned out looking like crap. And this is how crap looks like on my toe.
So yeah, I have a lone snowflake on my toe because I cannot really be bothered to clean it off and paint all over again. I rather sleep. Heh. Besides, who is really going to scrutinize my toe?
So I decided to proceed without!
Here’s how to create the look. A really simple one to do cos everything is purposely done messy!
First step – base coat. Always an important step in my books. I haven’t started using my seche vite base coats yet.. Lol. And I didn’t exactly use a base coat, I used a stengthener instead here but this somehow works for me too.
Paint the base color. This could be any light color that you like..for now, this is my favorite. I don’t think I ever applied the same nail color again and again for so many consecutive manicures before. And in case you wanna know (again), it is orlon from orly. I painted 2 coats of this. Love love how natural they make my nails look.
Snow tips. Use a white color for the tips so the color feels like its snowing. I used OPI (can’t remember nail color and I am in the dark now, lights off and in bed but it’s off white with shimmer). Paint them haphazardly on the tip of your nails.
Because the color i used is not exactly opaque, i painted 2 coats so that it has a more layered effect, the first time covering a bigger surface area and thr second coat making sure that I paint only the tips to create a gradual color toning. Can you tell the difference from the picture above?
Load on the sparkles and we are almost there! Choose a glitter of your choice, the bigger glitter has more dramatic and more bling! You can also use a mix if you have different glitter polishes. Just mix and match. I used color club for this. Color to be named another day. I forgot to check them out, was so tired that I asked the husband to help pack everything and head to bed.
Coat the fingertips with loads of bling, adding an occasional bits at the nail bed, away from your colored tips. I dabbed the nail polish glitter on rather than paint like I would using a normal nail polish as glitter polishes are quite a pain to paint. There is always almost no glitter staying on the nail when I paint it. The brush picks up the glitter and all that I’m left is the transparent polish so I find dabbing a good way to leave the glitter on. Let me know if you have any other tips on this.. After all, I am self taught in this from my own trial and errors so I may not be the most professional!
Lastly, put on a coat of your favorite top coat and you are done! My favorite is seche vite! It’s fast drying and really glossy. Makes my nails look fab every.single.time.
What you think? It is nice?
I did both the mani and the pedi in an hour and it just tells you how easy it is! Hope you like this tutorial.
Meanwhile, I am on the hunt for a iPhone tripod stand so that I can take videos tutorials and show you guys (though I think editing is an arse and you guys will probably never see the video until a year later..)!
Ok. And up and about, rushing to work! I got a team lunch today and we are all gonna doll up and be color coordinated! Just simply an excuse so I will not look slipshod.
It’s Thursday already! Christmas will be early this year since my office is on half day tomorrow. Totally loving the festive mood. I hope you have a great day!!
Posted via LiveJournal app for iPhone.


4 Comments
Anonymous
bag chanelbags-onlineshop.com
check chanelbags at my estore chanelbags online
Anonymous
bag chanelbags-onlineshop.com
check chanelbags at my estore chanelbags online
Anonymous
dvd to ps3 converter
get dvd to ps3 converter to your friends dvd to ps3 converter to get new coupon
Anonymous
dvd to ps3 converter
get dvd to ps3 converter to your friends dvd to ps3 converter to get new coupon